How to Build an Easy Horse Fence Cheap
Building fencing for livestock on your homestead can be time consuming and expensive. But when you are investing in your animals, you want to make sure they are safe and secure in their pastures and paddocks, so effective fencing is very important.

How to Build an Easy and Cost Effective Horse Fence
My daughter participates in the 4-H Horse project and we have been looking for a horse for quite some time. We were unexpectedly presented with the opportunity to purchase a horse that was a great fit for my daughter, and it was from a trusted source (there are a lot of sketchy people out there in the horse buying/selling world).
We did not want to pass up the opportunity so we had to quickly build a fence in order to bring our horse home. Additionally, we needed it to be a cost effective fence.
While we were very budget minded in how we built the fence, we also wanted it to be done well. We did not want to have to invest more money in fixing a subpar fence, or have to spend a lot of time redoing our work.
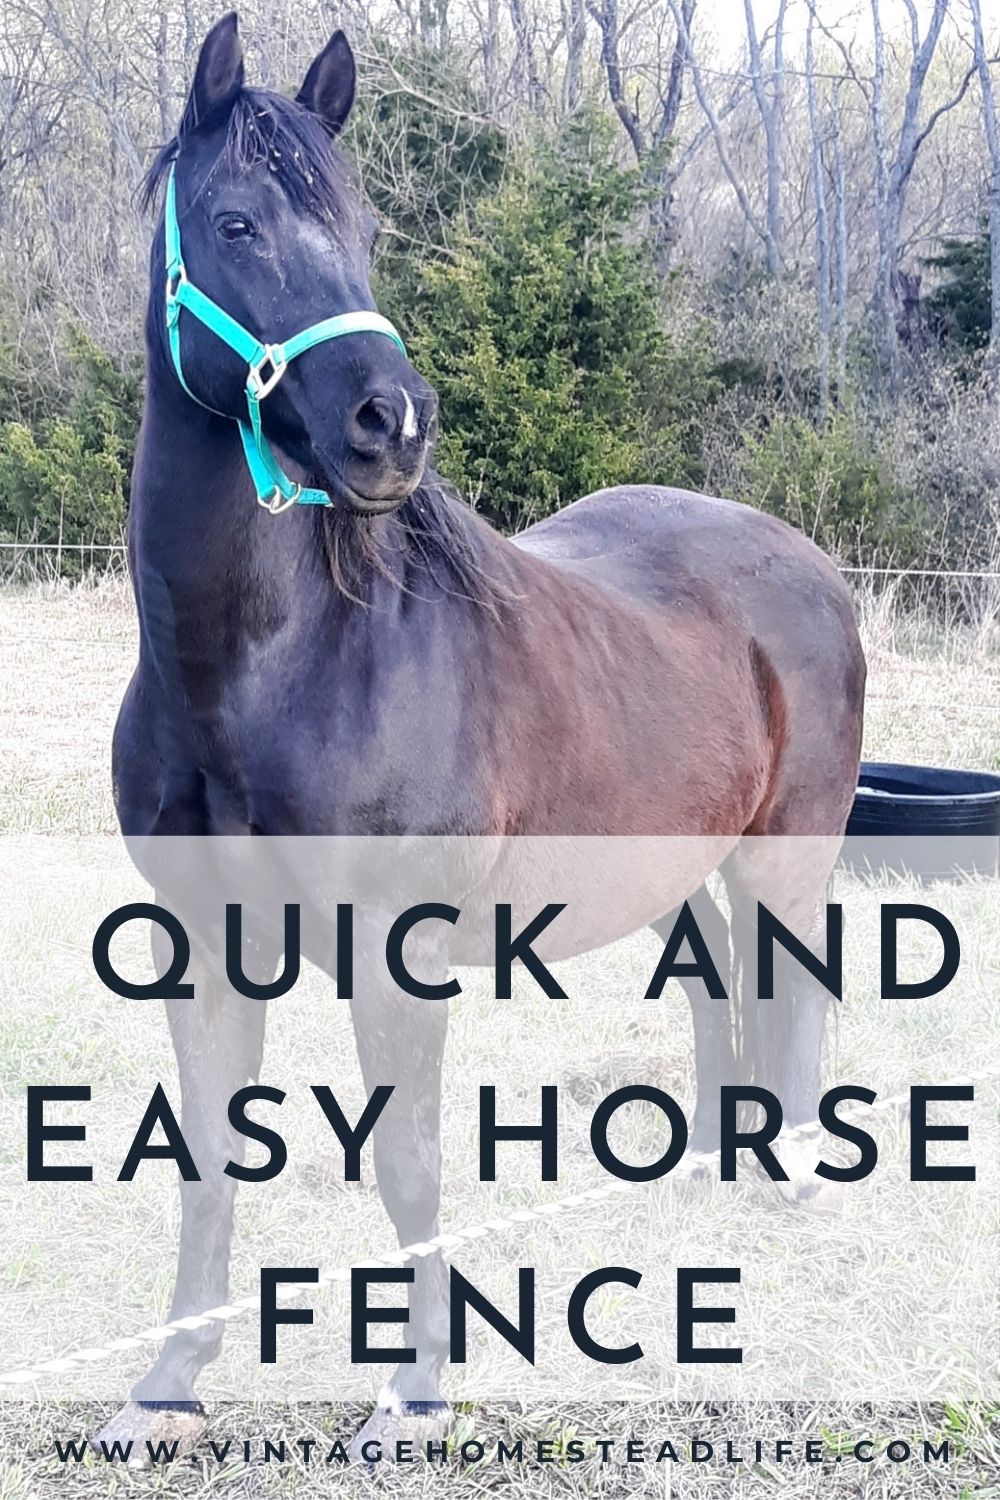
We were able to build our horse fence quickly and cost effectively through the use of electric polywire.
We chose to get our fence supplies through Premier 1. We are not affiliated with them in any way, we have simply had great success with their products in the past.
Premier 1 has some of the best pricing available and their products are of very high quality. Additionally, they have fantastic customer service. If you ever have any questions, do not hesitate to call them. They are very honest in their recommendations and will never try to upsell you.
We are quite pleased with how the horse fence turned out. It is a safe and effective fence for our horse. This guide will detail how we built our horse fence in just a matter of days, and how we did it in a cost effective way.
As a note, this fence works well for our horse, who is a calm horse and is already trained to fences. This fence might not work well for more high spirited horses.
Materials
– 2 Wooden fence posts (approximately 6 inch diameter and 8 feet tall)
-Livestock utility gate with gate hardware (ours is 6 feet wide)
-20- 50 pound bags of all purpose gravel
-Post hole digger or auger
-Tamper
-Level
-T post pounder
–Polywire (we used 2 rolls of 660 ft)
-3 Steel T posts
-3 Steel T post insulator covers
-26 Portable Fence Posts
-4 P Springs*
-4 Ropelinks*
-6 Notched Terminal Insulators*
-4 Wood Post Insulators*
–Solar Engergizer
–Power Link
–Braided Rope
-20 inch section of 2×6 pressure treated wood
*These numbers are for running two strands of polywire. If you run only 1 strand, or more than 2 strands of polywire, adjust accordingly
Process
Step 1
The very first step is to mark out where your fencing will run. We used a long tape measure to measure out the distance of each side of the fence. We placed flags in each corner. You will also need to determine where your gate will go and mark that place as well.
We did not spend a lot of time making sure everything was perfectly square. We were comfortable with eyeing everything, especially since this fence is fairly adjustable.
Step 2
The next step is to make the holes for the gate posts. We used a gas powered auger to dig our holes. We dug our holes 18 inches in diameter and 30 inches deep.
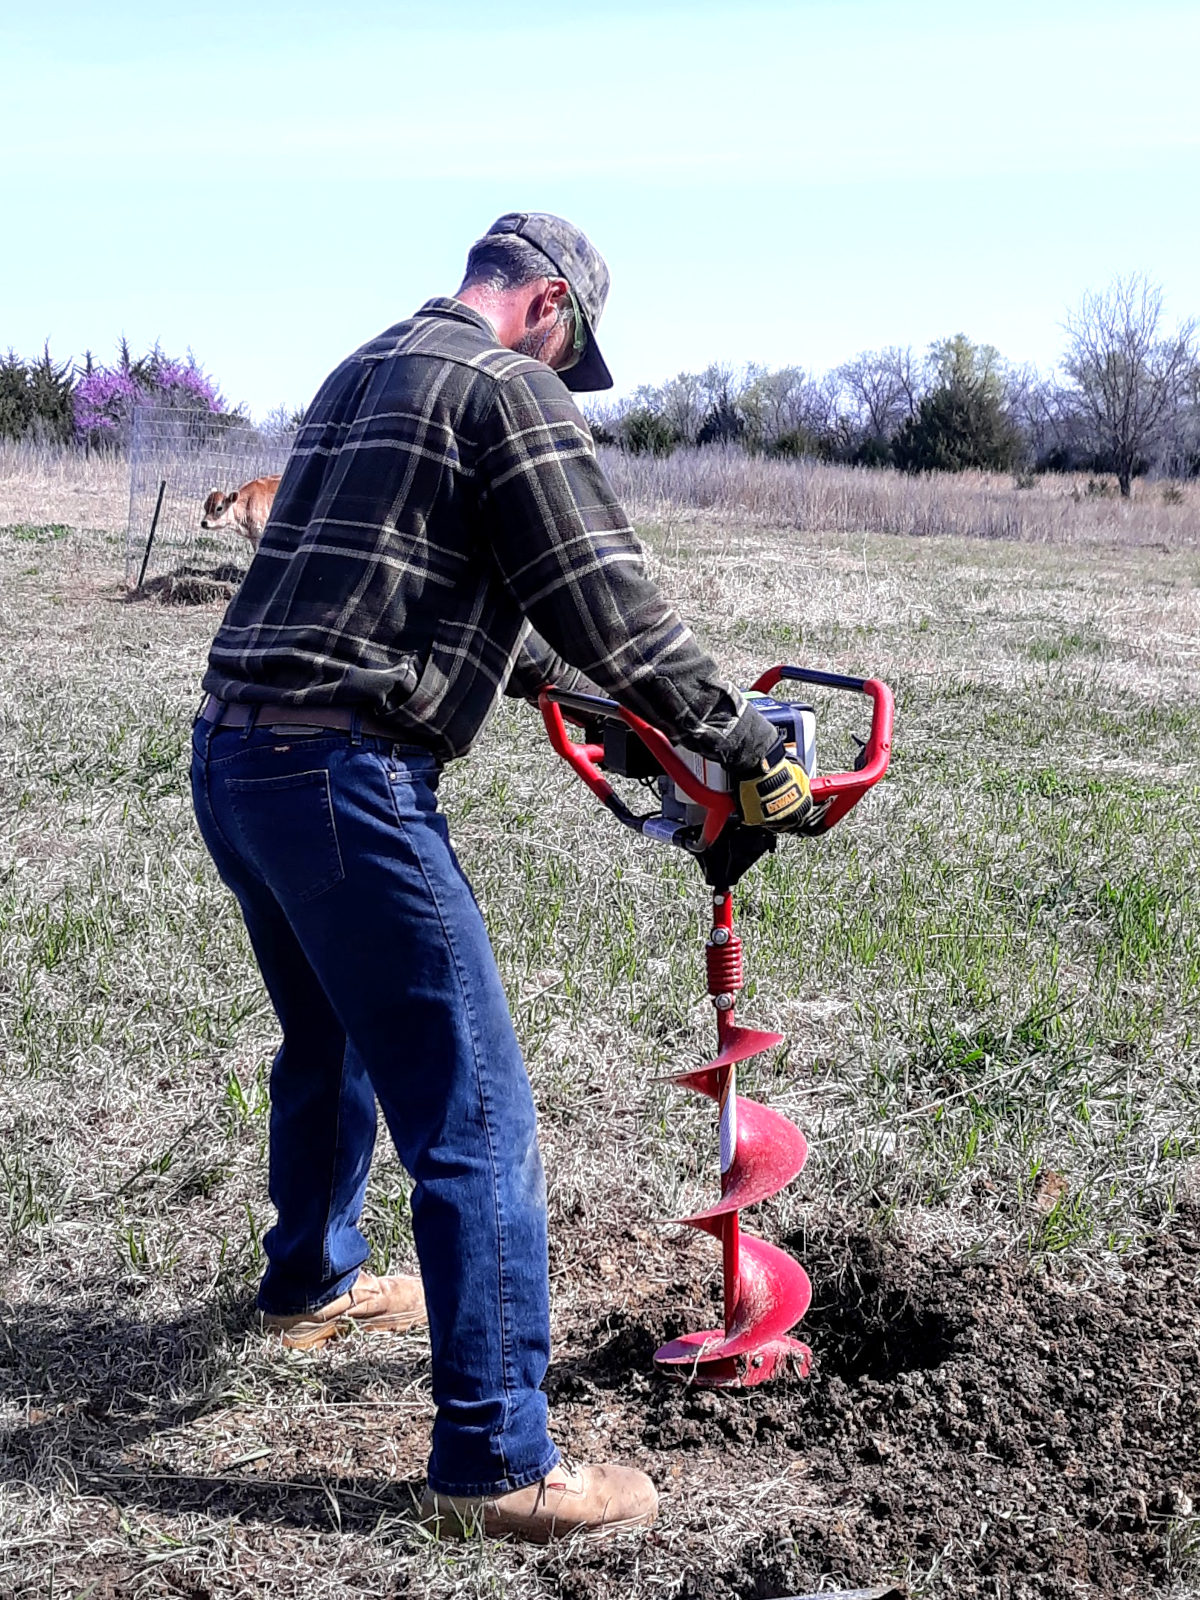
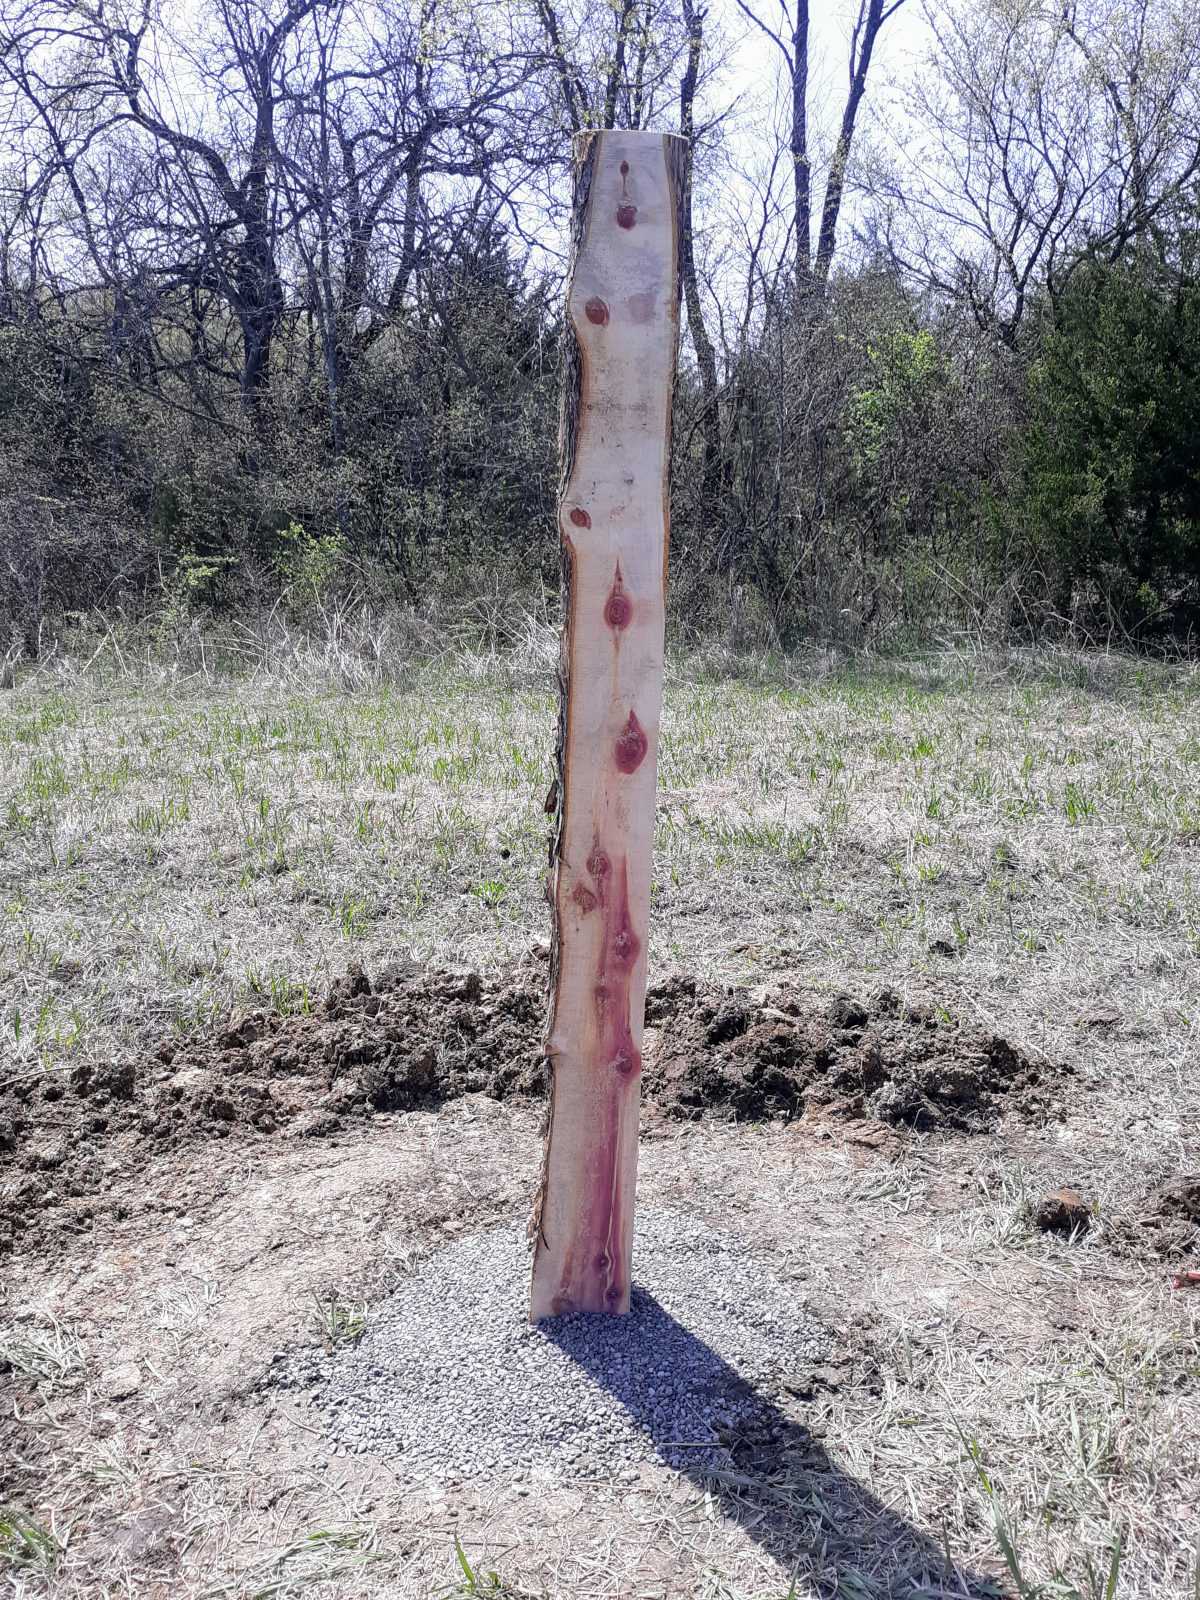
You will want to make sure you have sturdy gate posts that can withstand the weight of the gate. We used cedar trees that we cut down on our property and my husband milled them into approximately 6×6 inch posts. Store bought pressure treated wood fence posts would also work.
Step 3
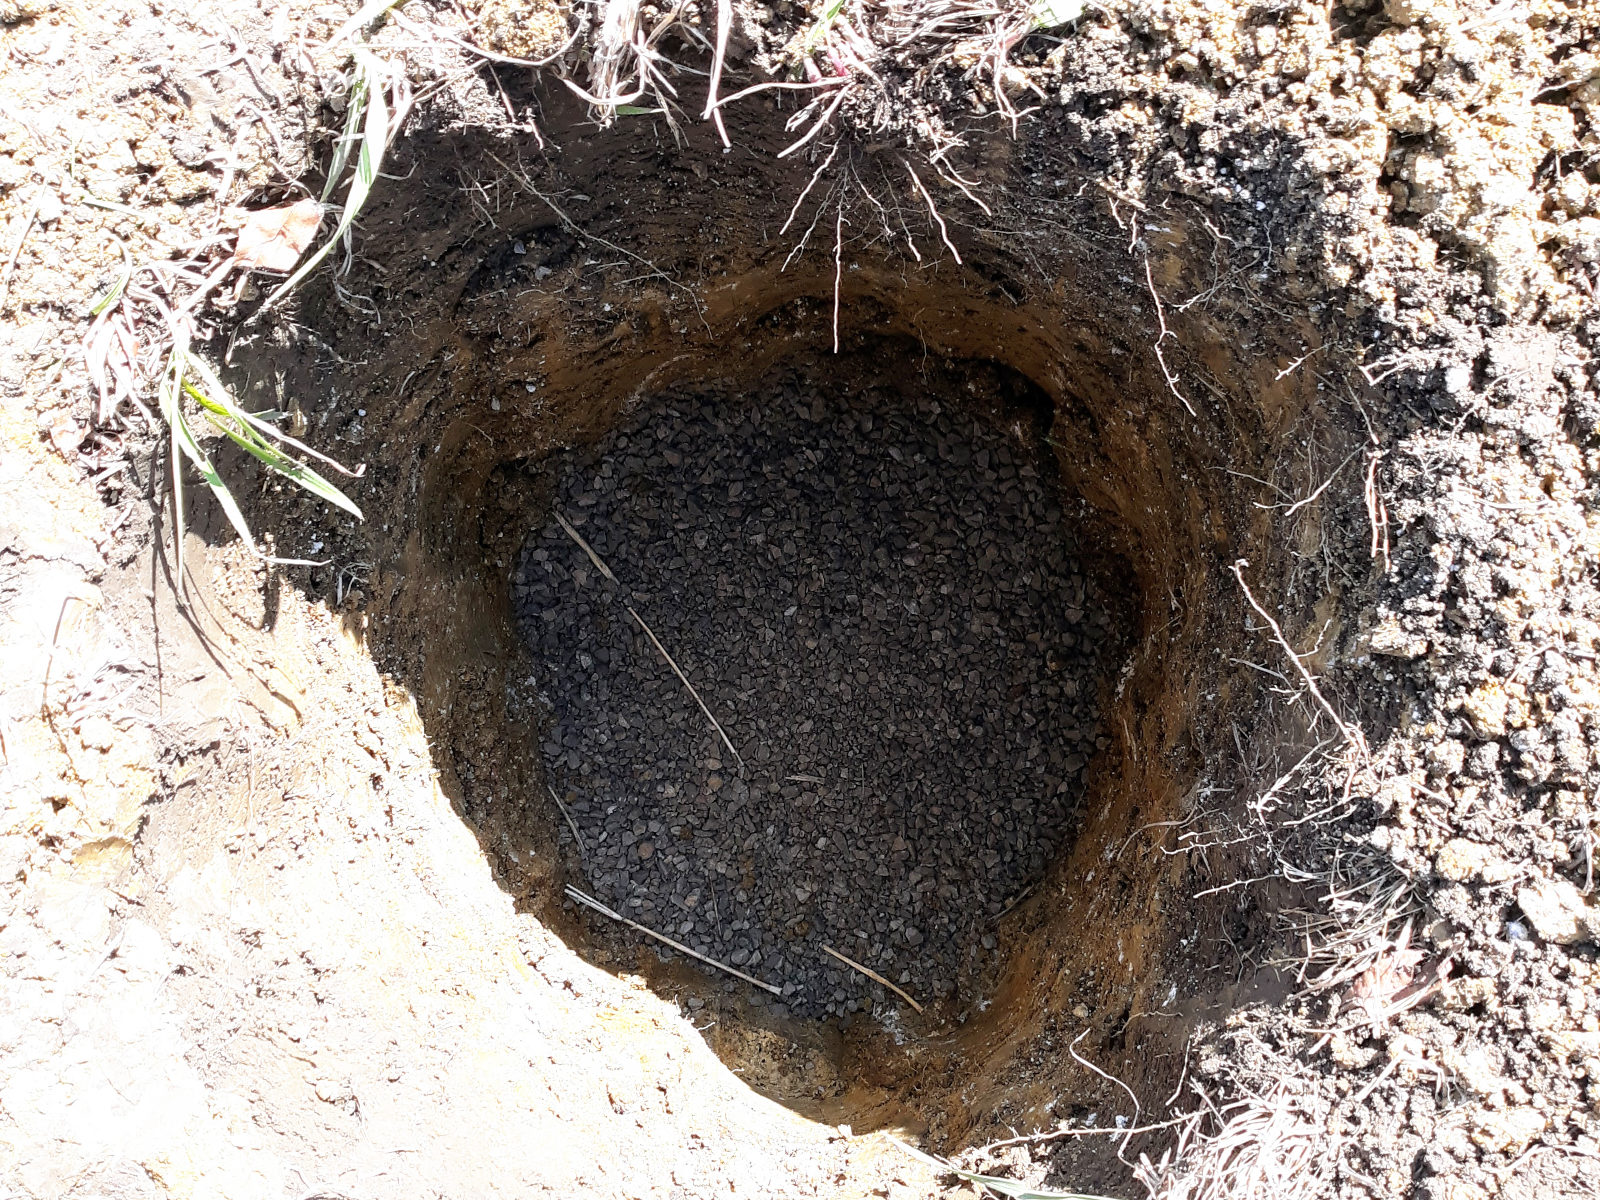
We chose to use all purpose gravel to fill our post holes. We decided to do this because it provides a sturdy foundation for the post, but is not permanent. Should we ever decide to change the use of this paddock, we can remove the posts and fill in the holes.
We poured one bag of all purpose gravel into the bottom of the hole and then tamped down the gravel.
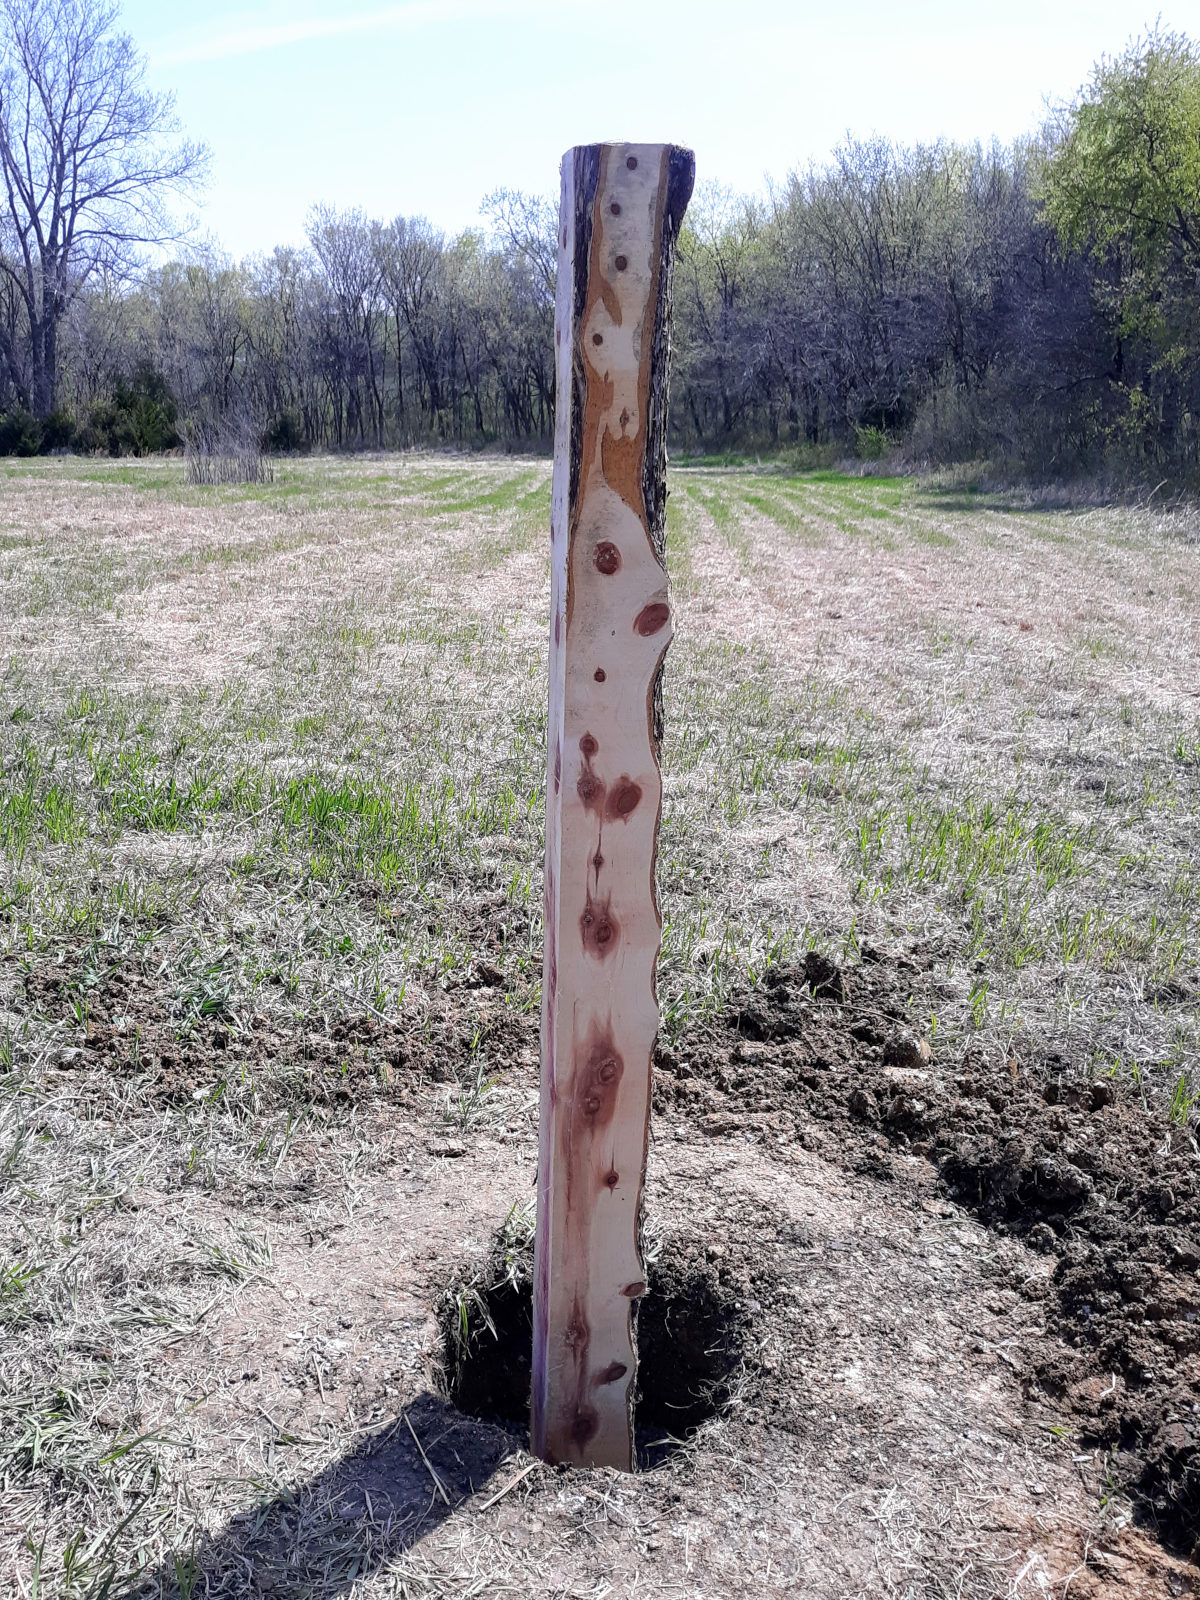
Once the gravel was level we put the post in the hole. As I held the post in place, I used a level to make sure the post was level within the hole. My husband filled in the hole with more gravel as I held the post.
We added an extra step to the second post that we put in. We wanted to give it extra support because it bears the weight of the gate.
After tamping down the first bag of gravel and placing the post in the hold, we followed the directions from this video and dug out a spot to place a 20 inch section of 2×6 pressure treated wood in the hole perpendicular to the post.
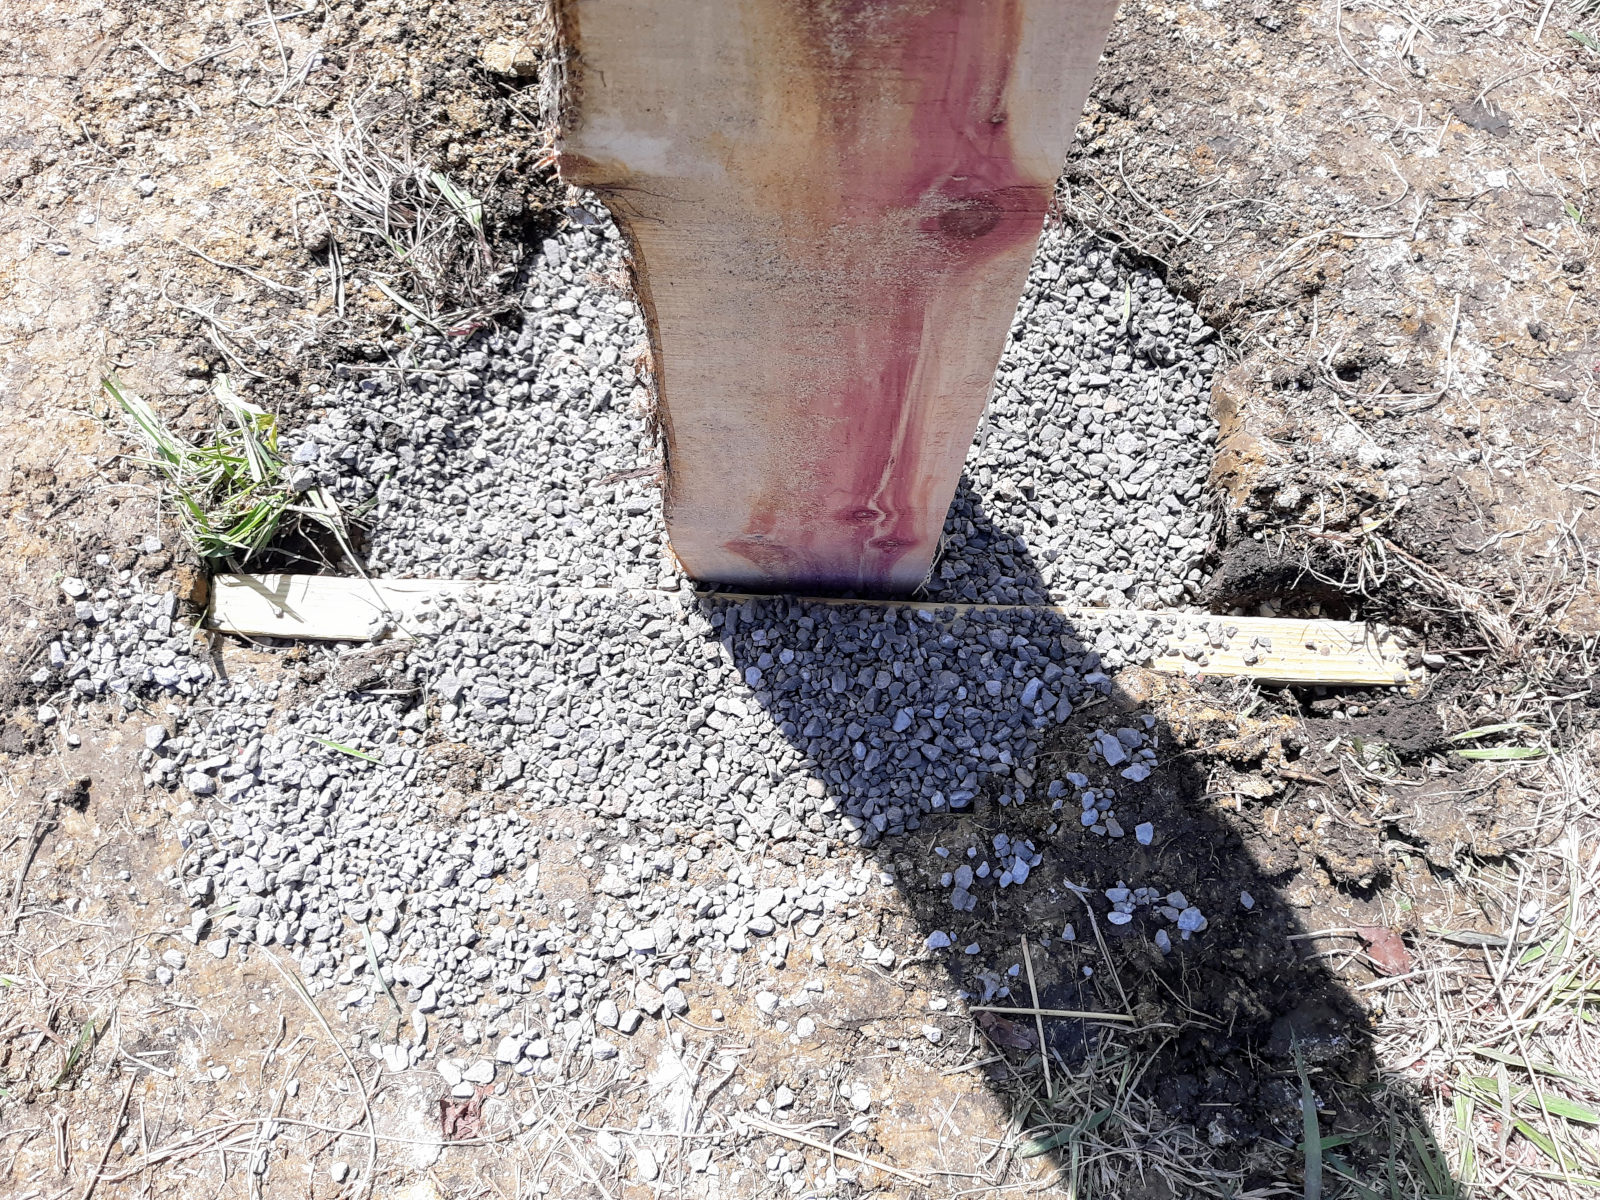
We then finished filling in the hole with the gravel. We are really happy with how the pressure treated board supports the gate post. It is really sturdy and is holding up well.
We used about 10 bags of gravel on each fence post hole. We made sure to fill the holes slightly above ground level and sloped the gravel down and away from the fence post to help water drain away from the fence post. We also tamped down the gravel that is on top to make it nice and tight.
Step 4
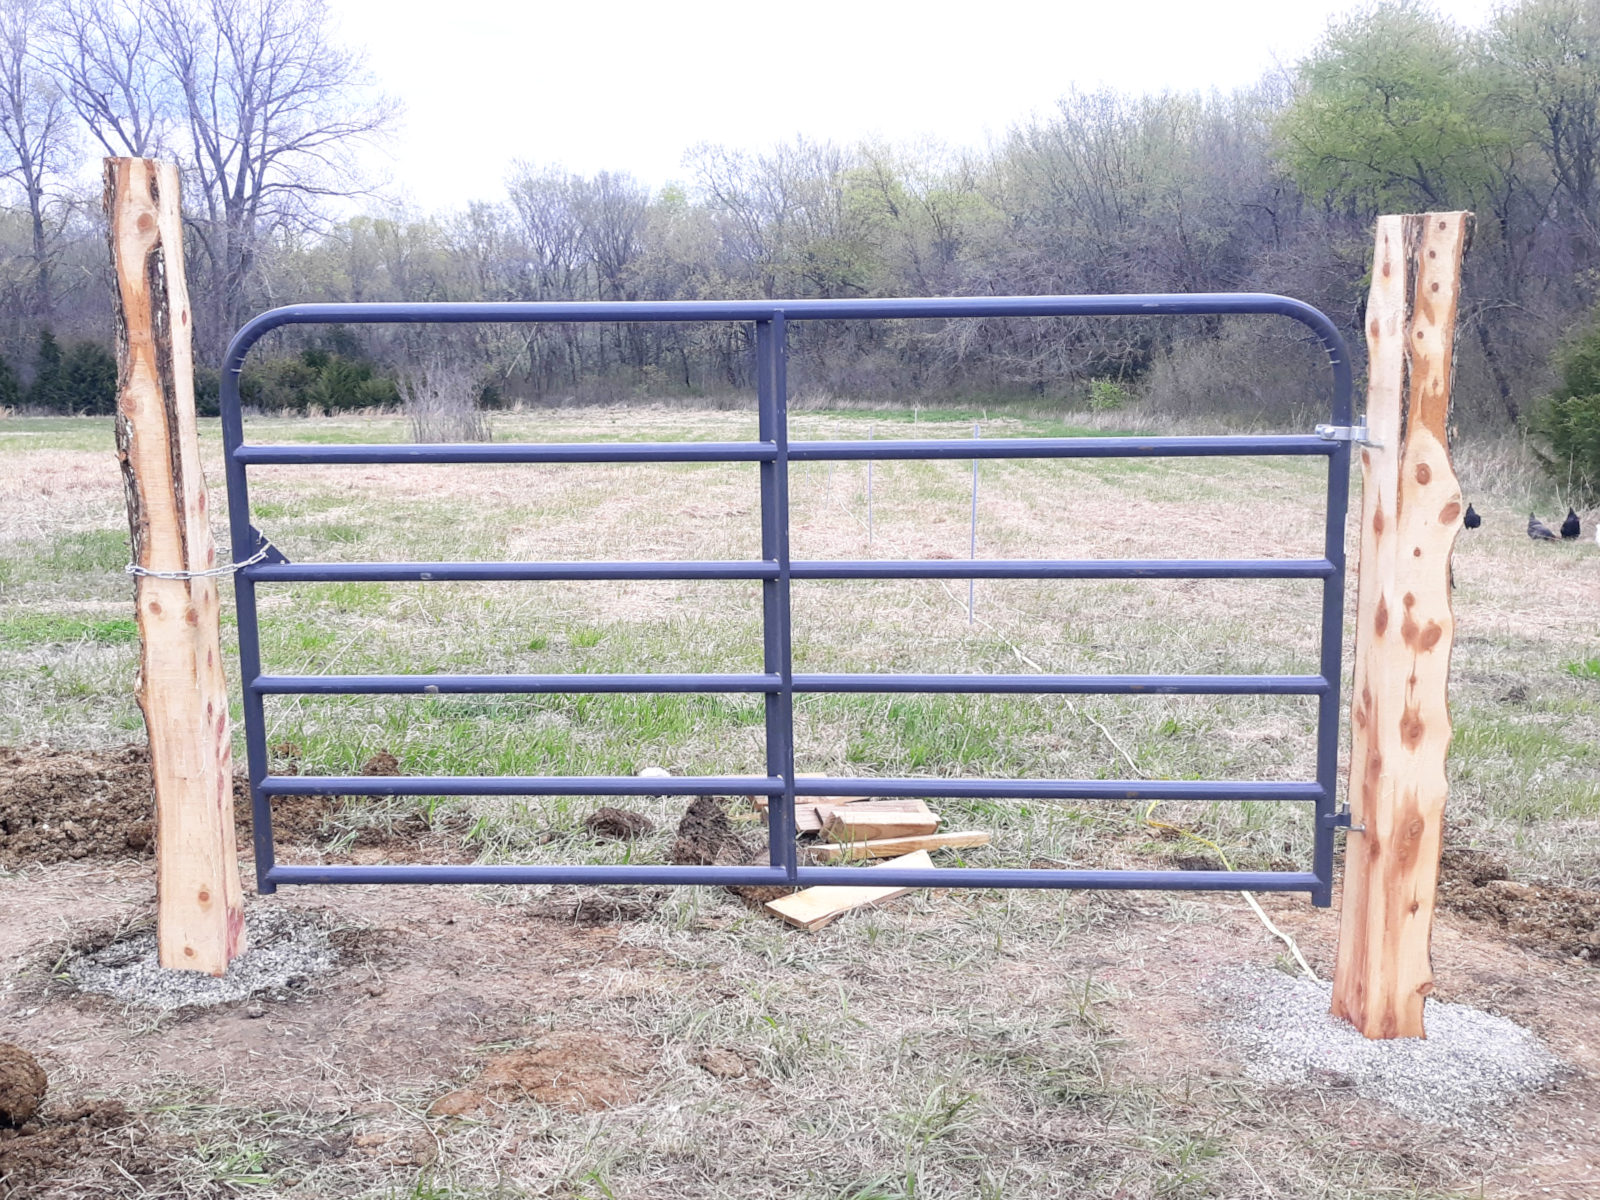
Next we installed the gate. The gate we purchased came with the mounting hardware. We held up the gate to see how high we wanted to mount it. There is a bit of a slope next to our gate and we wanted to make sure it had plenty of room to clear the ground when it swung both directions.
After determining the height we measured and marked where we needed to drill. We drilled pilot holes into the post and then screwed in the mounting hardware.
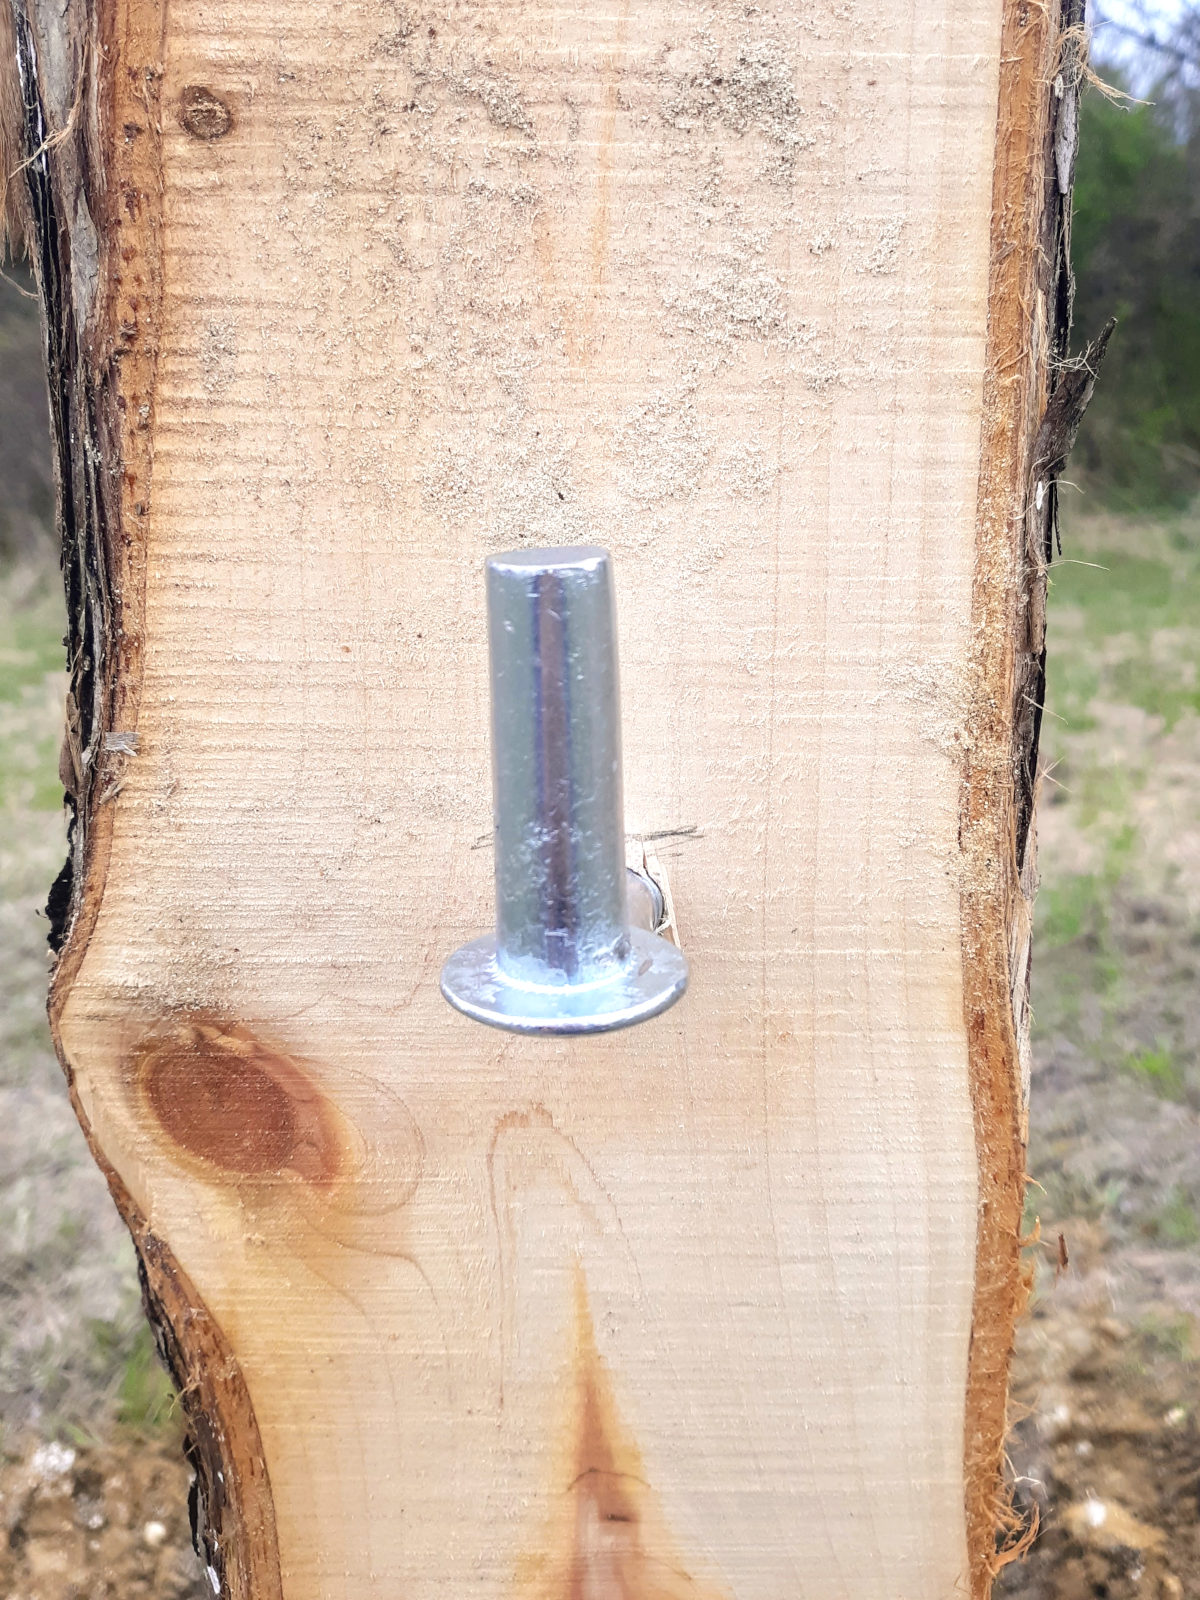
After the hardware was installed we mounted the gate onto the hardware.
Step 5
The next step was to put the T posts in place. Because we installed the gate in the corner of the pasture, we only needed 3 T posts. If you place your gate in the middle of the fence line, you will need 4 T posts.
We used a T post pounder to put the T posts in at the places we previously marked with flags.
Step 6
We then measured out the space between each T post and placed the step in posts at 25 foot increments between the T posts.
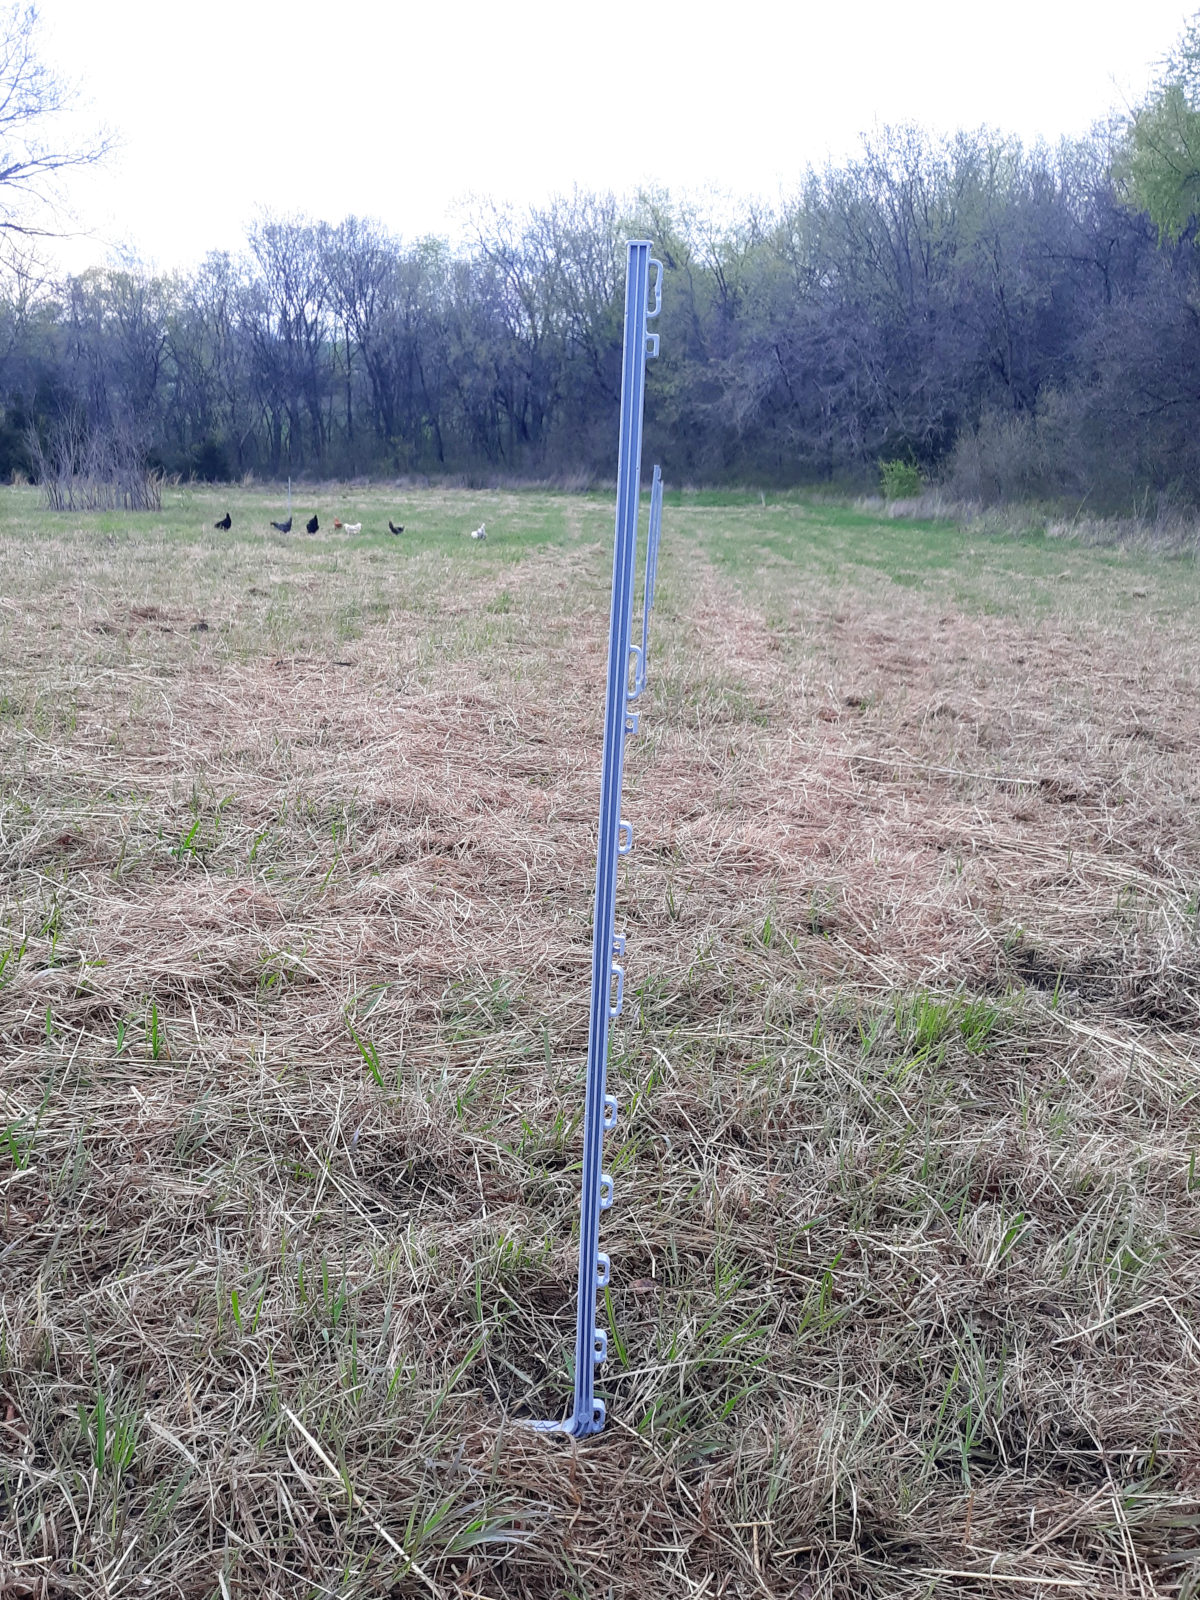
Step 7
Now we were ready to start installing the polywire. We determined at what height we wanted to run the polywire. We decided to do two strands, one at 24 inches high and the other at 44 inches high.
We placed two wood post insulators on each fence post at the two heights that we decided on. To do this, we drilled a pilot hole and then screwed them in place with our hands.
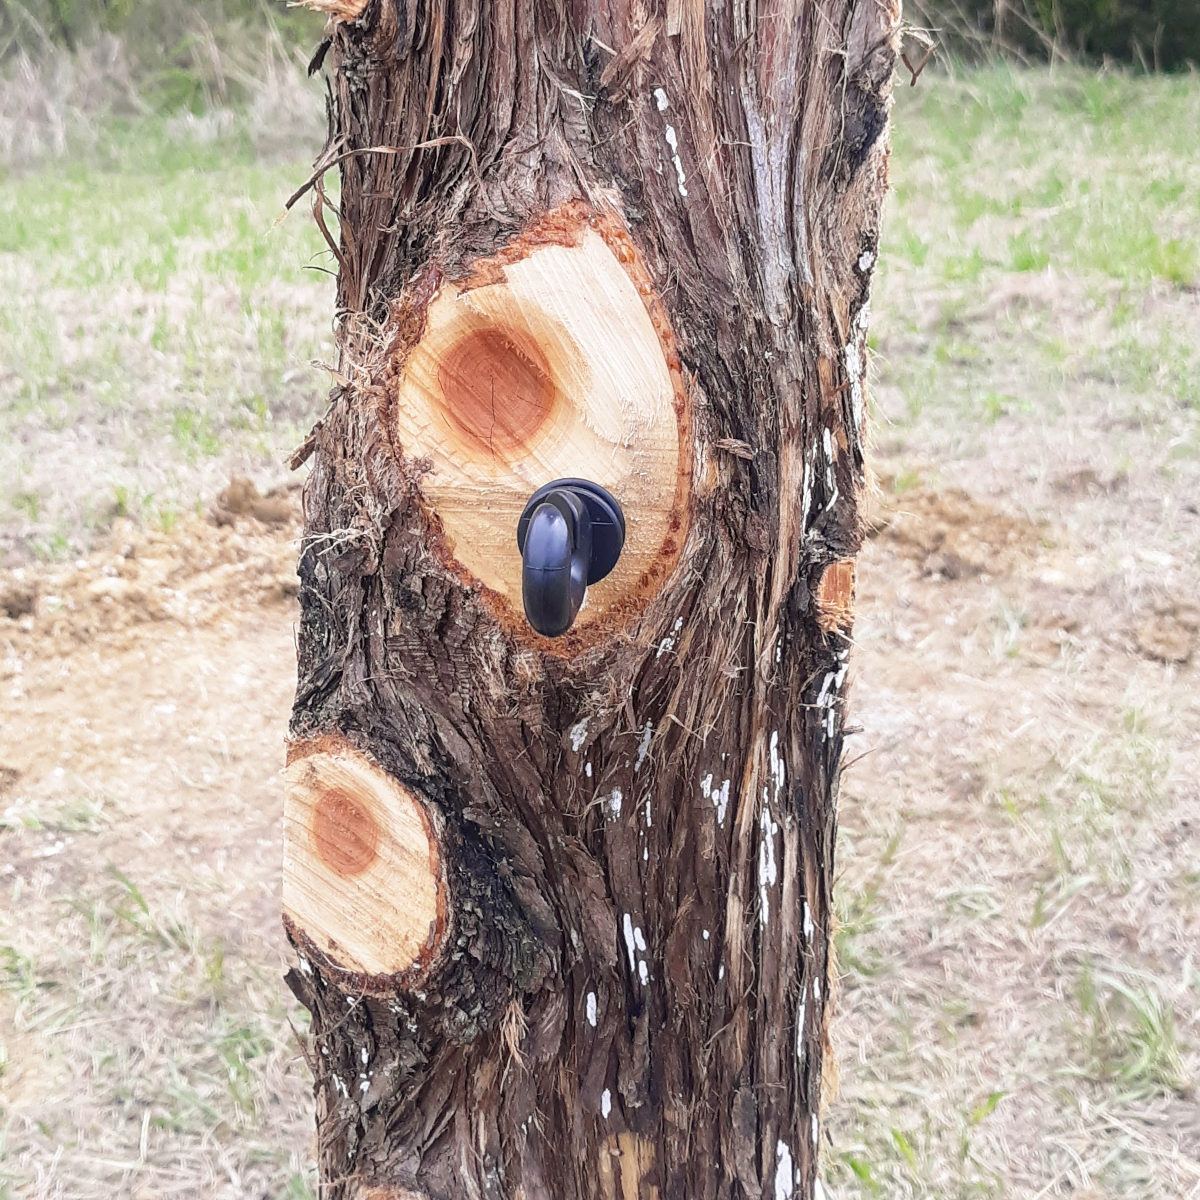
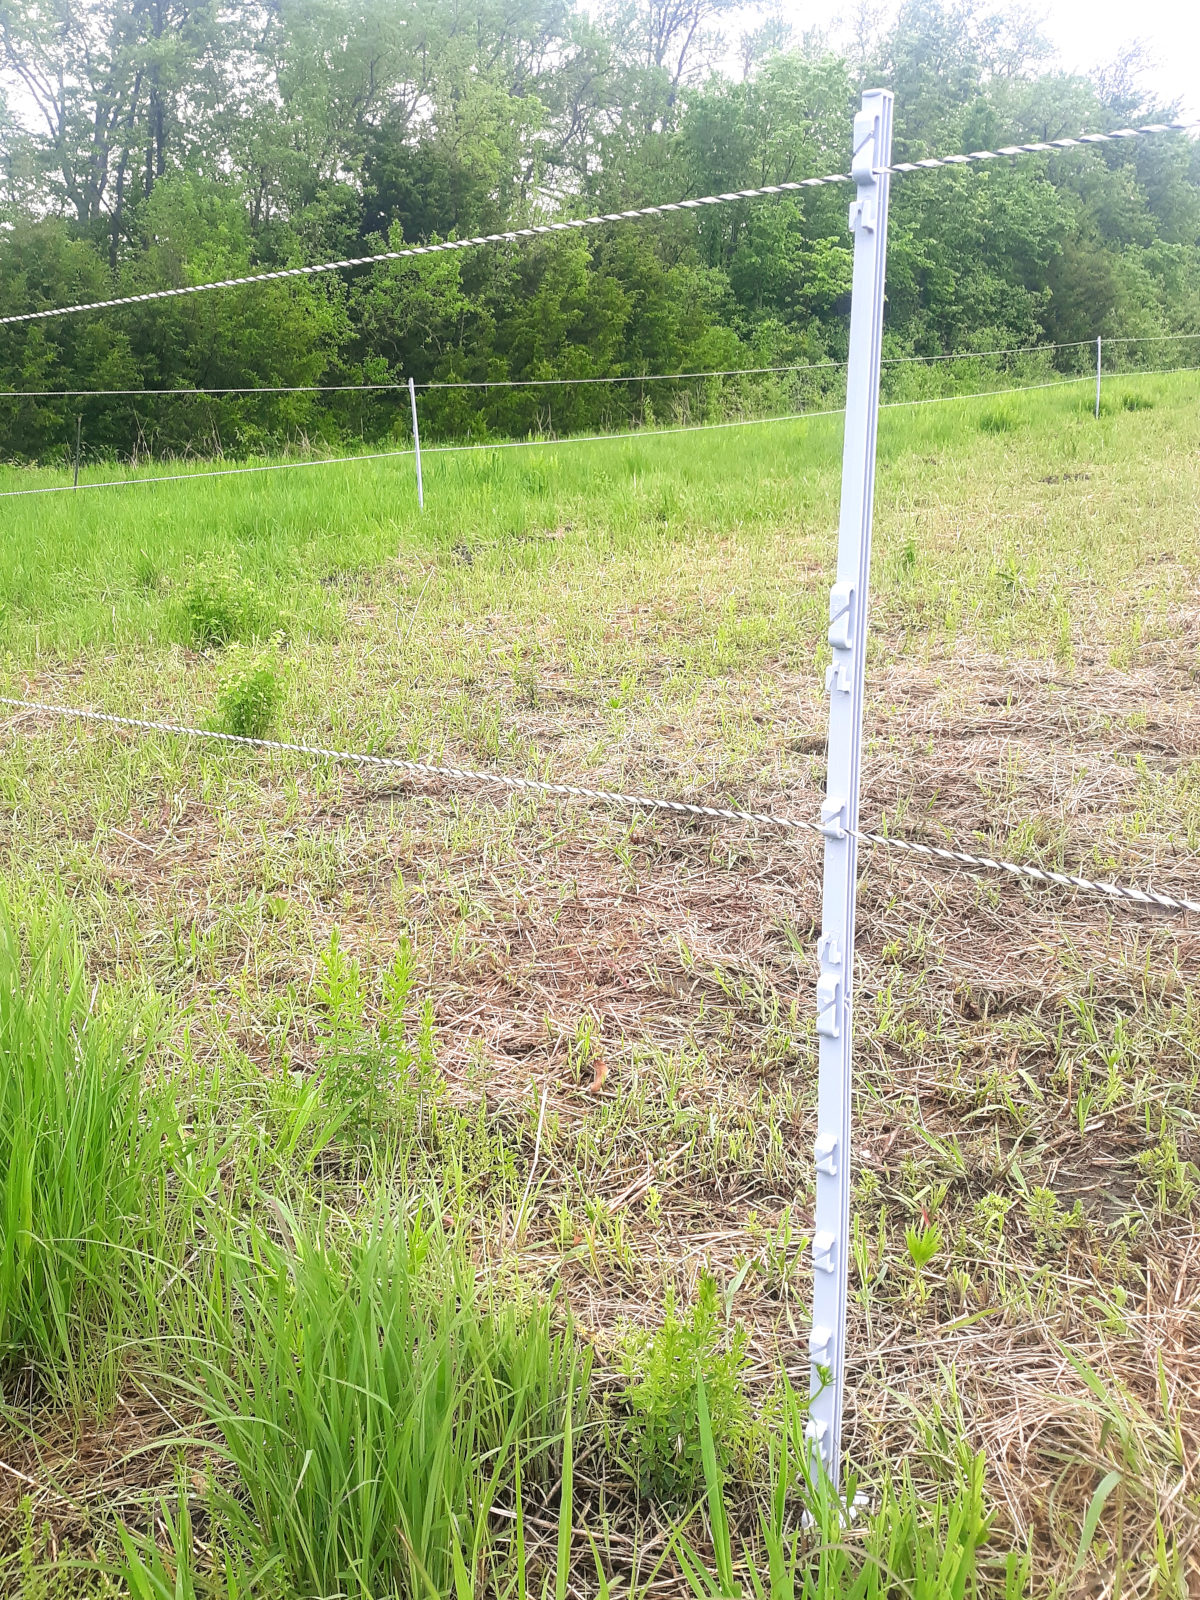
This is also when we attached two terminal insulators to each T post, again at the determined height of the two polywires.
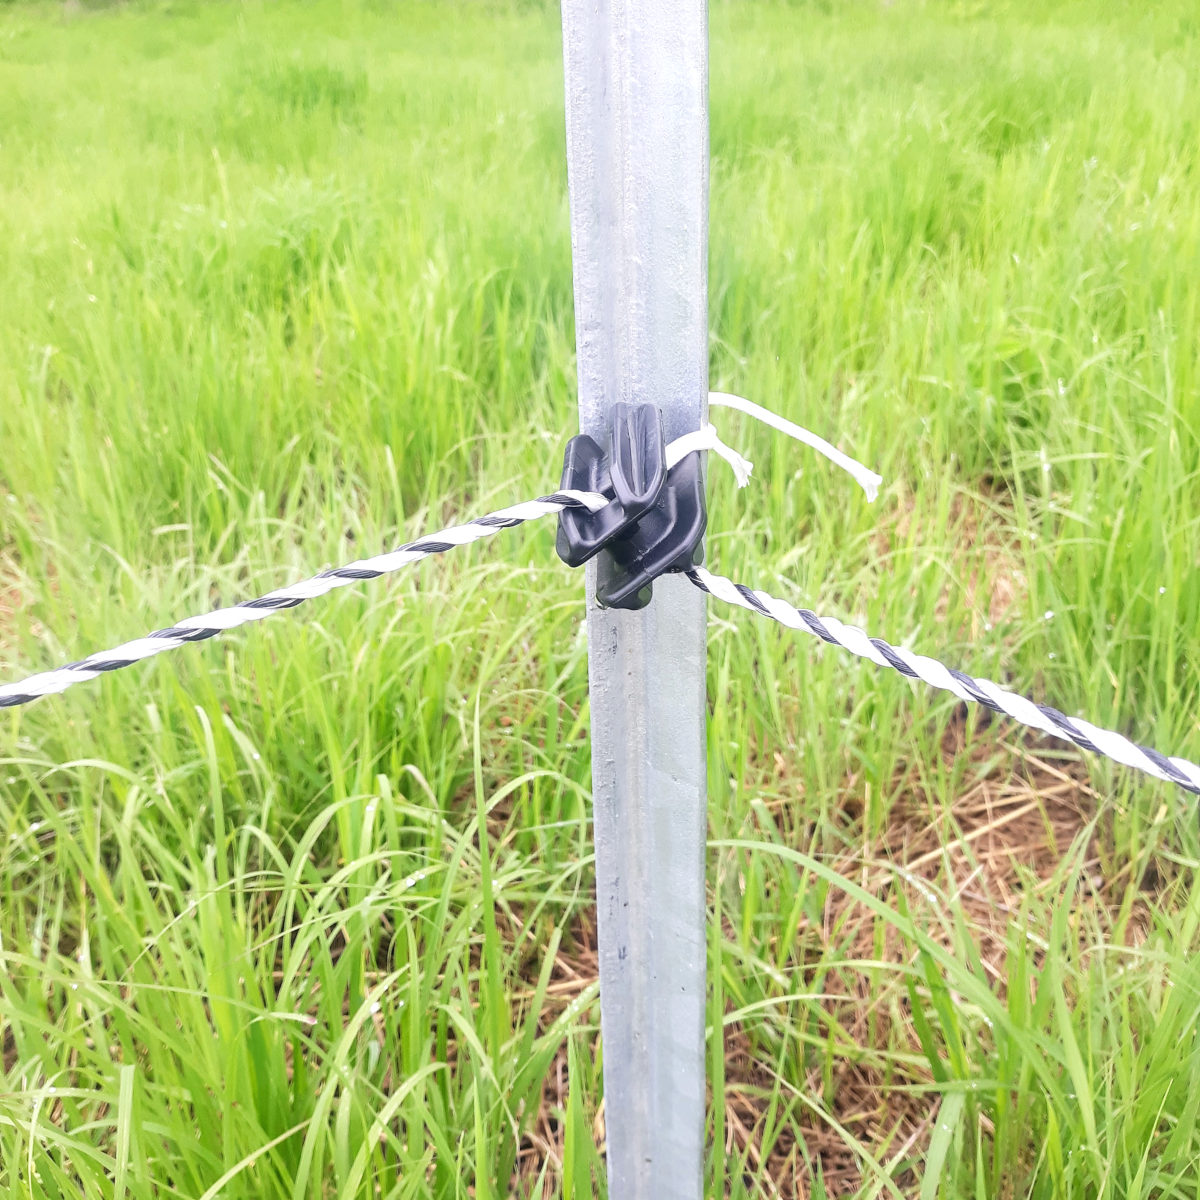
This picture was taken after we finished the fence. We attached the black insulator to the T post and at this point we had not put up the polywire.
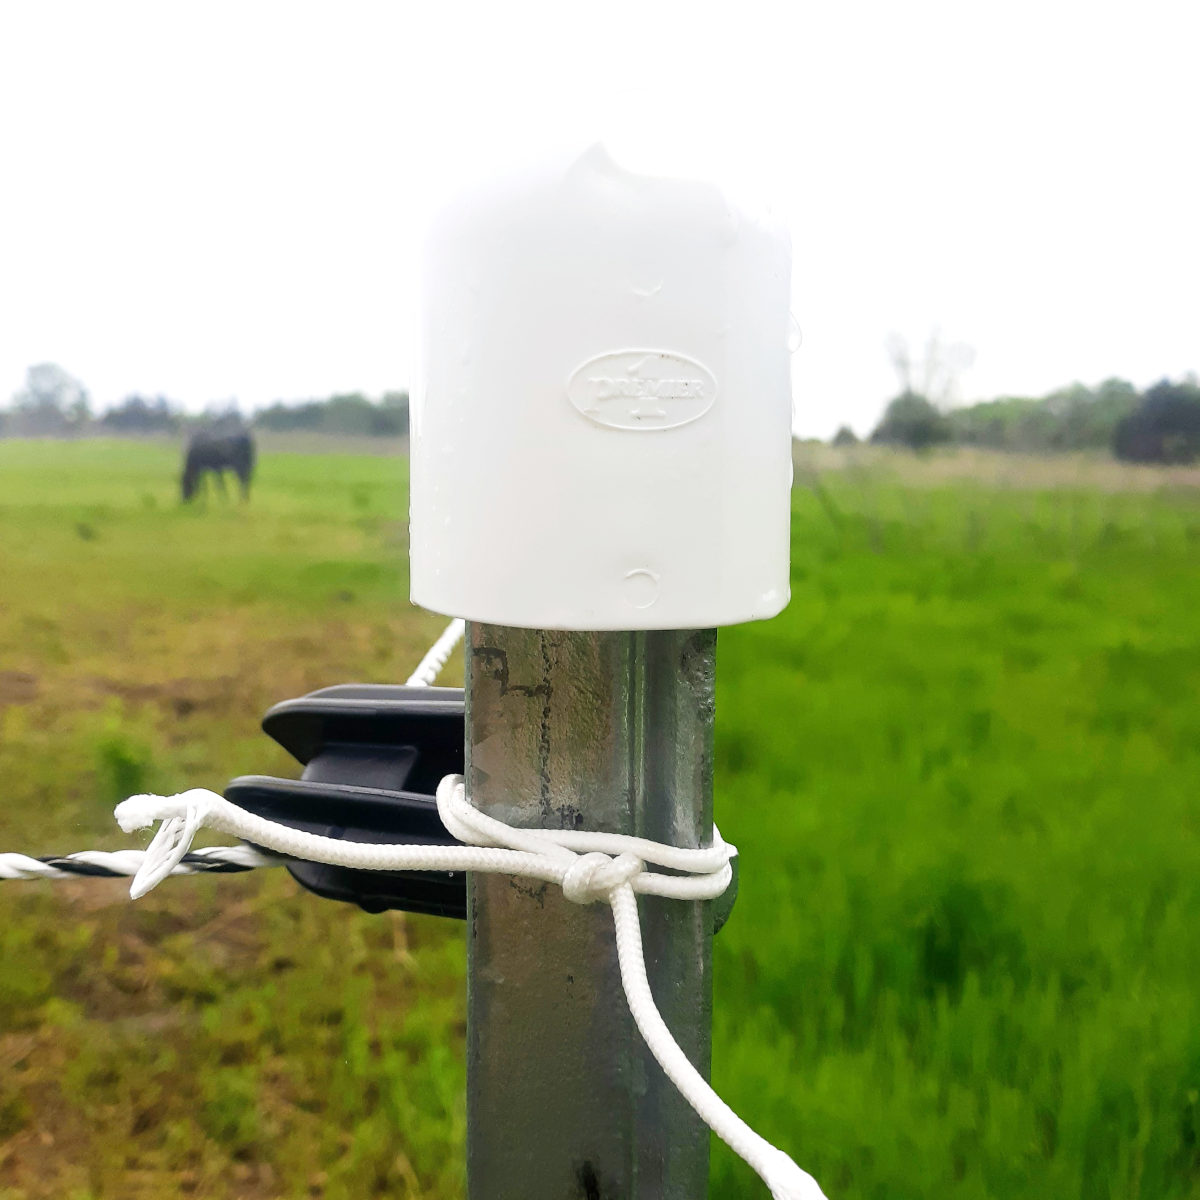
We attached the terminal insulators by tying them to the T post with braided rope. We tied a square knot on the rope.
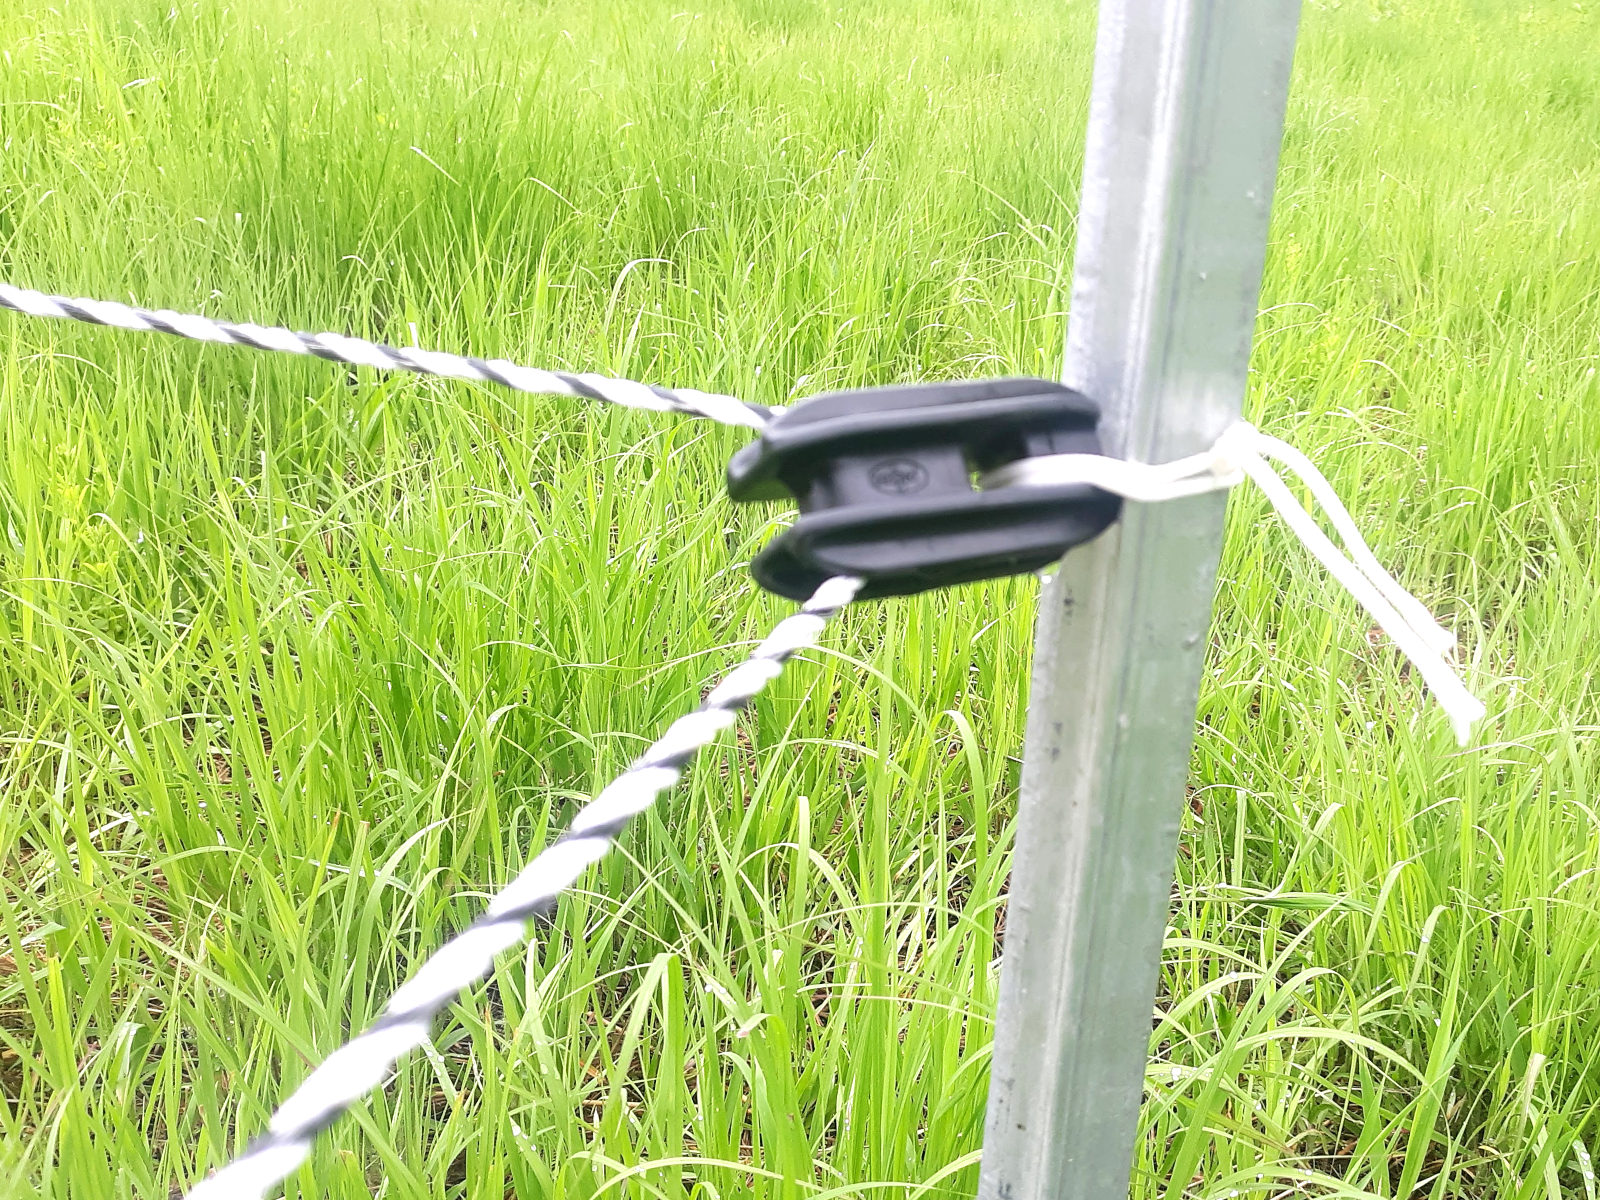
Note: We did not get the notched insulators, and we wish we would have! We had to string the polywire through all of the insulators on the T posts before we could attach the polywire to the step in posts. If we had gotten the notched insulators we could have just slid the polywire in the notch when we got to the T post.
We also placed the T post insulator covers on top of the T posts for safety purposes.
Step 8
Here is where things get a bit more technical. We had to reference some of Premier 1's videos online in order to do the next part properly.
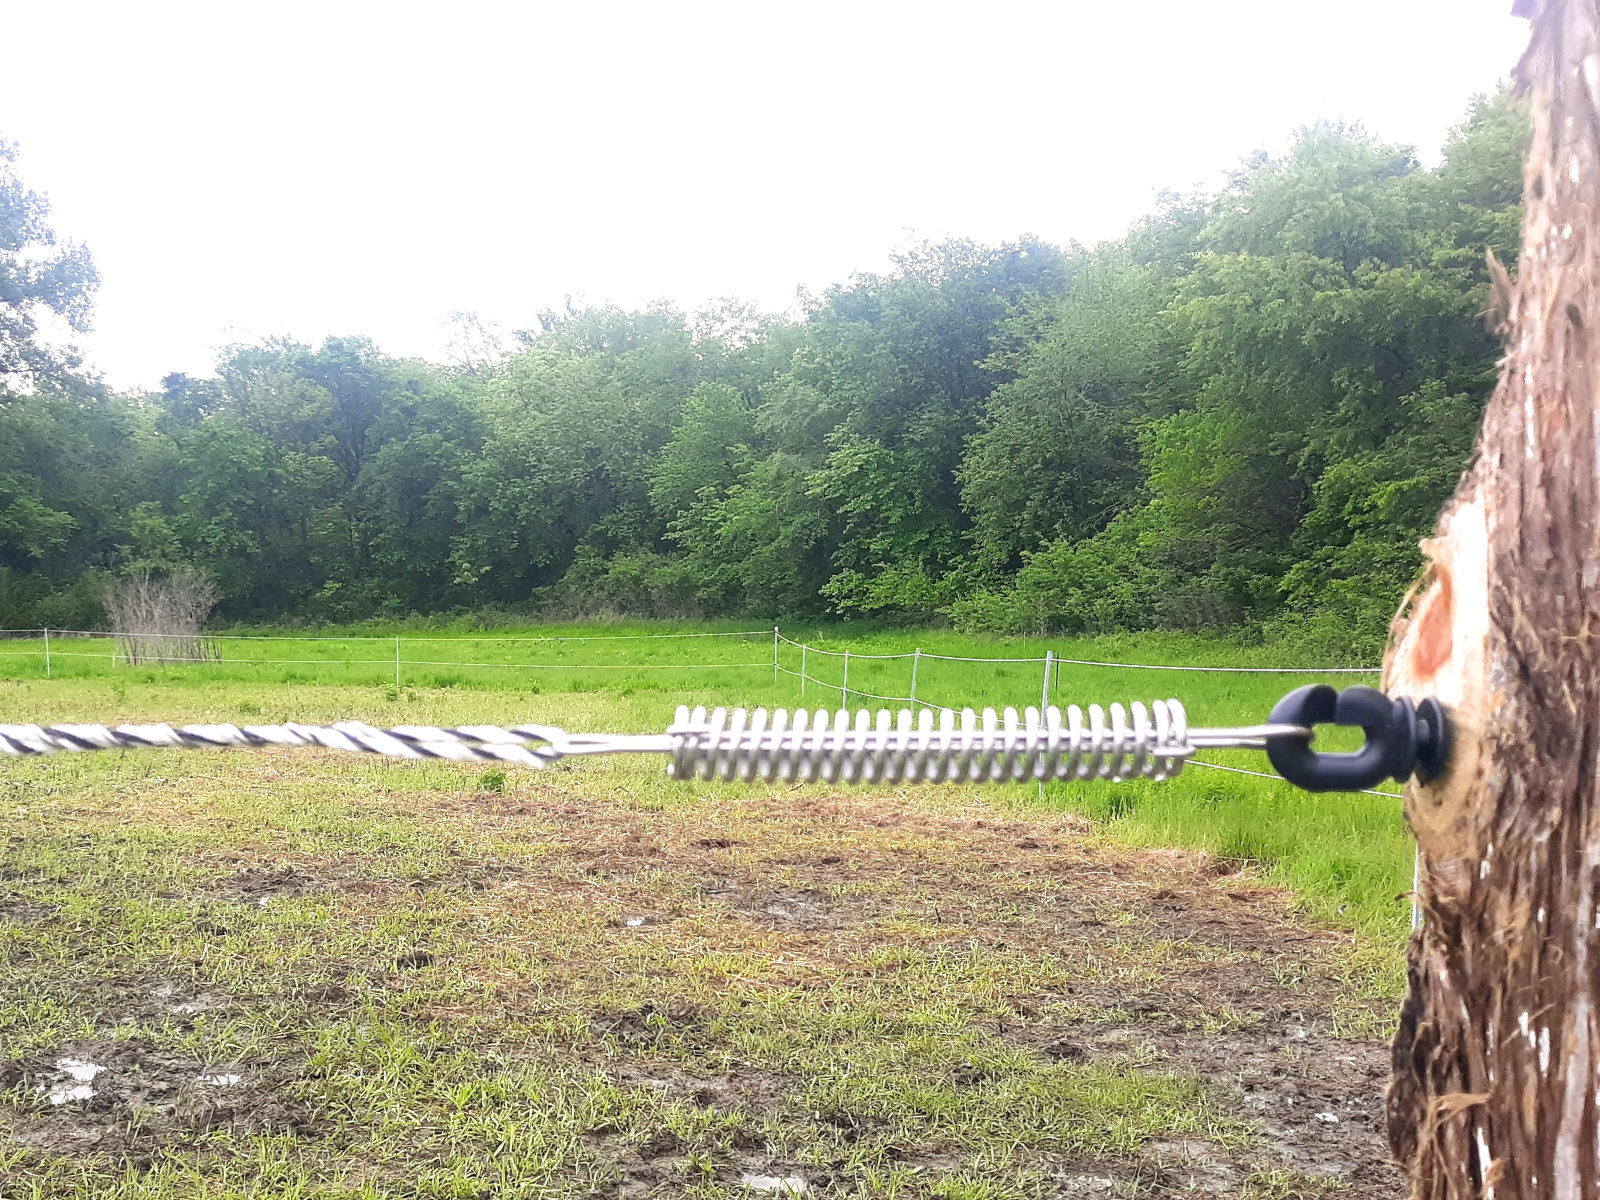
The next step was to attach a P spring to the wood post insulator. Then we looped the end of the polywire through the P spring and then used a rope link to attach the end of the polywire to itself.
Step 9
Next we strung the polywire down the length of the fence, and stopped at each step in post to insert the polywire into the step in post clip.
Step 10
When we got to the end, we took another P spring and hooked it to the wood post insulator. Then again, we looped the polywire through the P spring and used a rope link to secure the end of the polywire to itself.
Step 11
We then repeated the whole process over again for the second strand of polywire.
Step 12
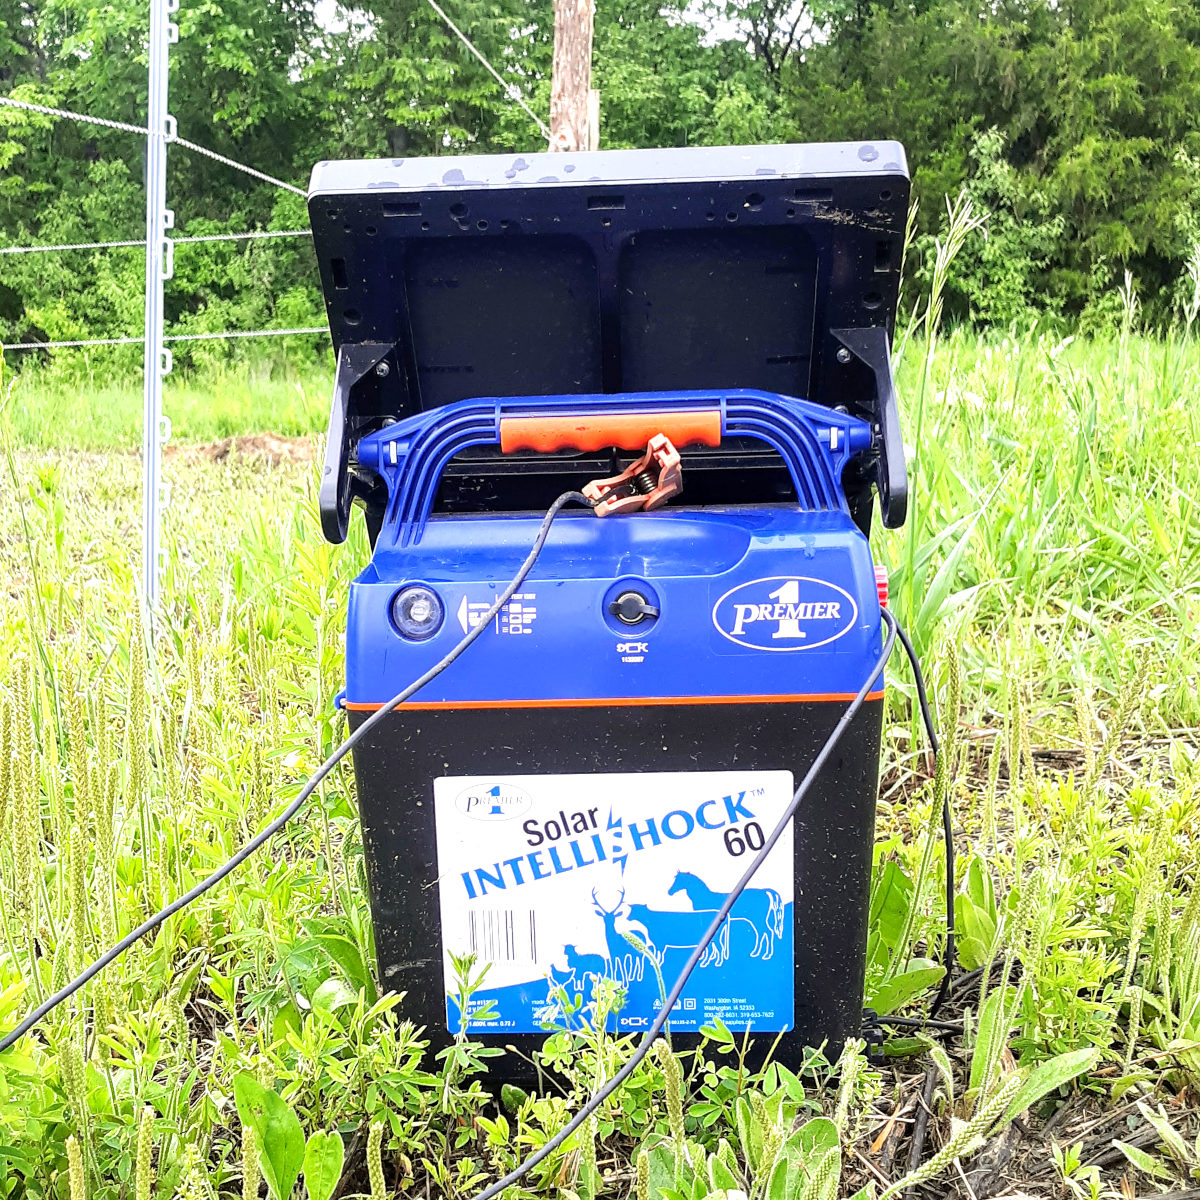
Our last step was to electrify the fence. We used this solar energizer that we already had on hand. There are other options that you can use, such as energizers that you can plug in. But we have had great success with this energizer and we appreciate its portability and ease of use.
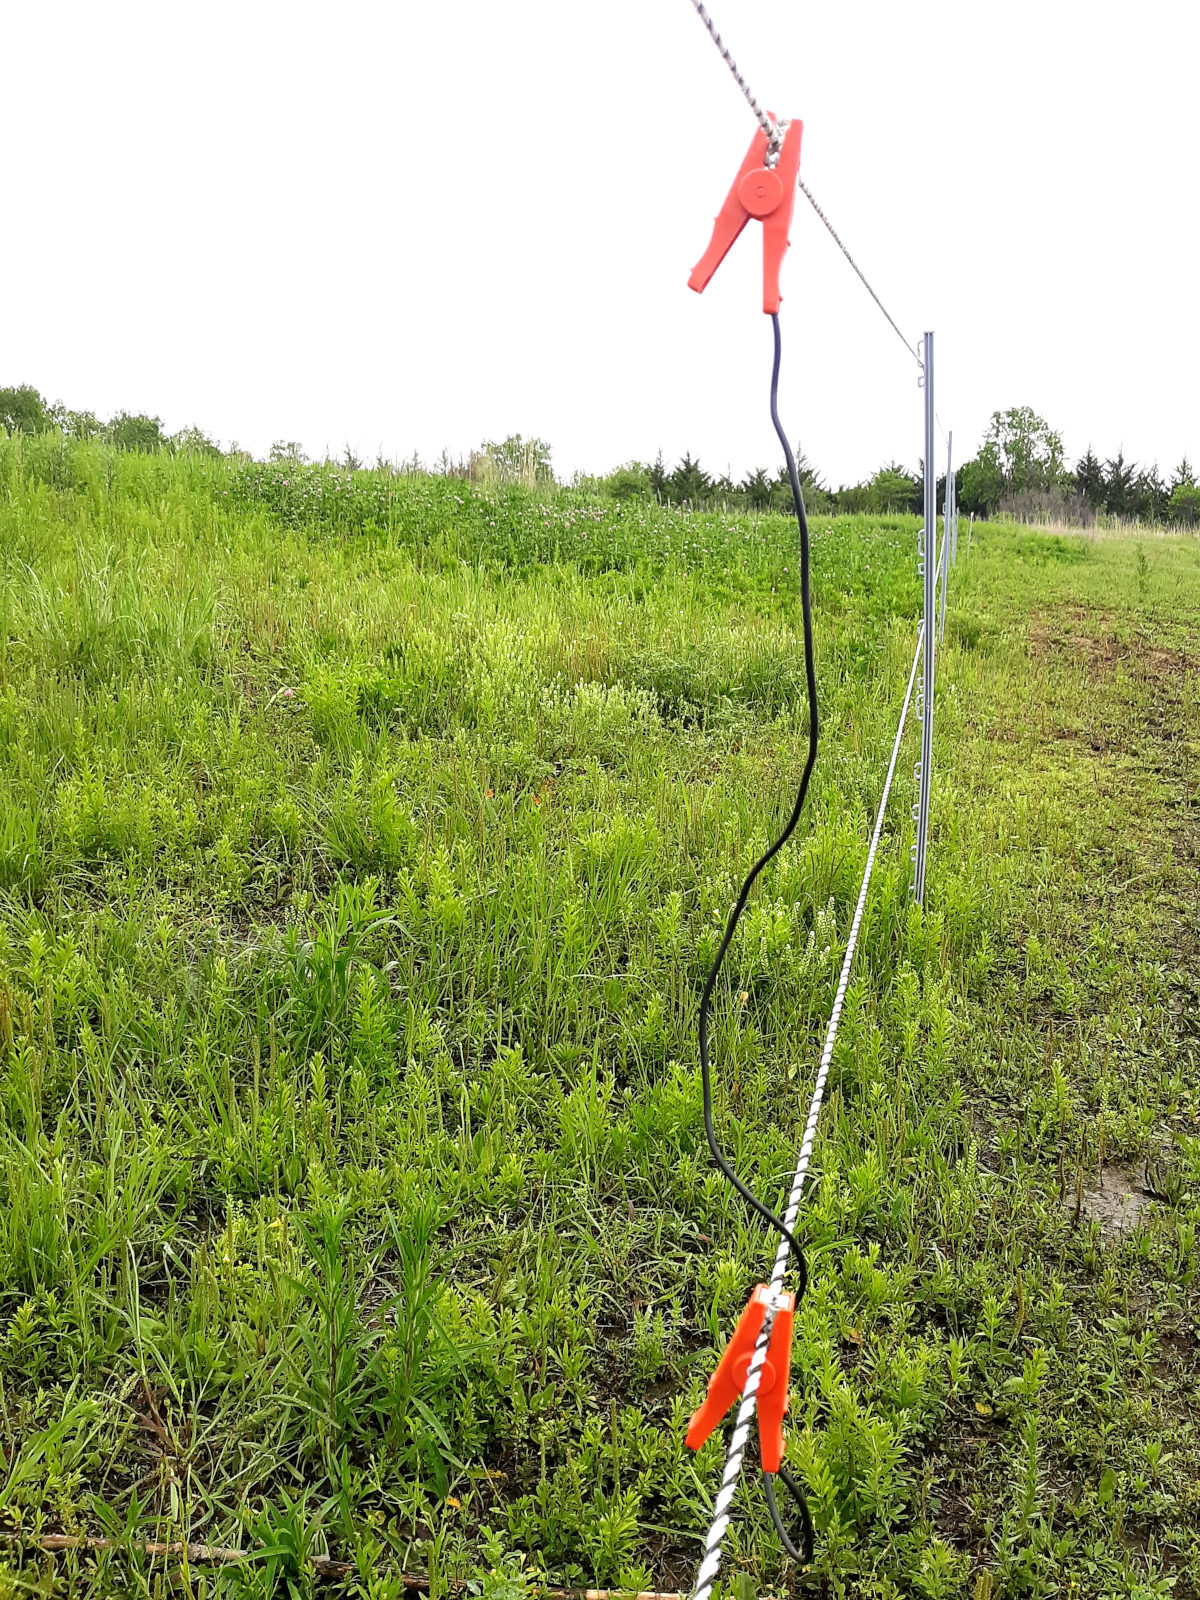
We also used this power link to link the two polywire strands together. When you connect the link from the solar energizer to one of the strands of polywire, it only electrifies that one strand. Putting the power link on both of the polywire strands electrifies both of the strands.
We are quite please with how the fence turned out! We have plans to build a second paddock so we can rotate our horse between the two paddocks in order to prevent overgrazing. We appreciate the ease of installation and look forward to getting the new paddock up soon.
Source: https://vintagehomesteadlife.com/how-to-build-an-easy-and-cost-effective-horse-fence/
0 Response to "How to Build an Easy Horse Fence Cheap"
Post a Comment